Tags
blog hop, blogging contest, Christmas, contest, crafting, crafts, crochet, earrings, foamie, Hollyday Earrings, patterns, The Gingerdead Man, thread crochet, xmas
For this month’s blog hop at Fave Crafts, we were asked to blog about either our favorite Christmas craft we have made or come up with something new. I decided to do both.
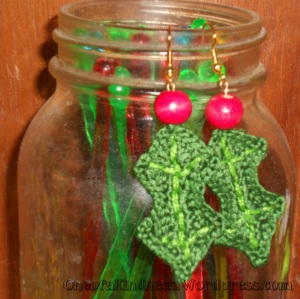
 First, here is what I came up with for the new. Holiday Holly Earrings, or – Hollyday Earrings! They are based on some autumn earrings I made for myself, which never fail to get compliments. I’m working on getting some in my Etsy shop, but they are in progress with so much else I’m working on these days…
Hollyday Earrings
Ingredients:
Green crochet thread, craft thread, or six-strand embroidery floss* (MC)
Complimentary green shade of thread or floss (AC)
size 7/1.65MM hook, or whatever hook you have that works with the thread
Embroidery needle
Iron
Spray starch
2 red beads
2 earring hooks
2 eyepins, or wire to make your own
Round nose pliers
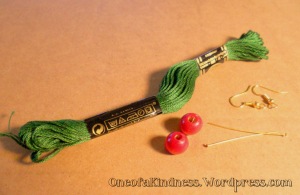 Leaves: Make 2
Using MC thread/floss & hook
Ch 17
- Turn, working in top loops only of your chain, sl st into the 2nd chain off the hook.
- Finish the side: SC, HDC, DC, TC, DC, HDC, SC, SC, HDC, DC, TC, DC, HDC, SC, sl st
- Now, flip it & you’re going to work back through the chain in the new top loops.
- Sl st in the first chain (the one you just sl st in above).
- Then finish the side: SC, HDC, DC, TC, DC, HDC, SC, SC, HDC, DC, TC, DC, HDC, SC, sl st (Tip: Crochet over your starting yarn tail on this side, & one less end to weave in when you’re done!)
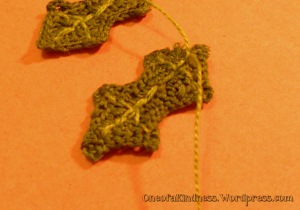
- Now, sl st around the leaf back to this end. In each of TC & the far tip, instead of a sl st do (SC, 3 ch, SC). You’ll do a total of 5 of these.
- When you get back to the end you started on, ch 3, finish off, & weave in your end.
- Now, grab your AC thread/floss & thread it in the embroidery needle.
- Beginning at the end you just finished with (3 ch, no SC), & do a straight stitch up through the spaces of the middle chain.
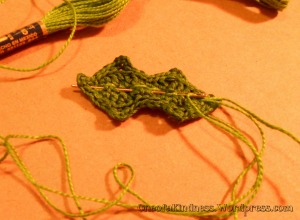 When you get to the end, you’re going to work back in the same holes you just stitched through, but in the opposite direction. You’ll be making a straight, solid line of stitches on both sides of the leaf.
- Repeat along the same line. This is the main vein of your leaf.
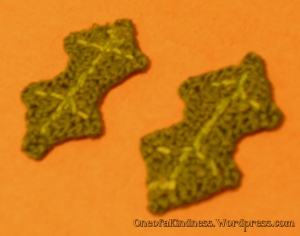
- One the way back the 2nd time, branch off the main line towards each of the (SC, 3 ch, SC). Work towards the peak & back to the main line for all four.
- You have given your leaf veins!
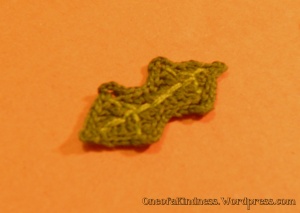 To finish it off, here is what I do. I am not an embroider by any means, so I have no idea what the proper way to do this is, but this is how I do it: Your ends are on opposite sides of your leaf, so make one more teeny stitch to get your ends together. Clip the skein end & tie the two ends together. Make a knot as tight as you can, but without bunching your leaf. Then trim each end as close to the knot as you dare. If you tie a good knot, it’s pretty safe since earrings aren’t likely to see a lot of washing or general agitation. It wouldn’t hurt to put a dab of glue on the knot to be safe though. I’d wait till after you iron them for the gluing.
- Now do it again with the other leaf.
- When you’re done, gently iron your leaves with just a splish splash of spray starch to crisp them up so they hang nicely.
We’re almost done! Just a little bit more tricky business making loops (or not so tricky if you’re good at jewelry making), & assembling our holly berries & hooks.
The end you just knotted, where you worked the 3 ch, but no SC, is the end you are working with here. The 3 ch space is your loop for hanging.
- I wrote this for eyepins, but I happen to be out of the gold-tone eyepins I wanted to use, so I’m making do with headpins. If you are in the same boat, you’re just going to nip off the head, & do a loop at both ends. Voila. Same thing if you’re just using a length of jewelry wire (but you probably already know that).
 If you do not know how to make a jewelry loop, here is a page that can explain it much better than I: Jewelry Making — How to Make a Loop It’s a pretty simple process if you have the right tool. If you don’t, it’s still doable.
- Now, plop one of your beads onto one of your wires, & make your closing loop, & repeat with the other bead & pin.
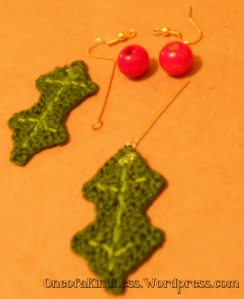
- To finish up your earrings, put a hook on one end of each pin, & a leaf on the other.
And there you have some fun, festive Hollyday Earrings!
Comments, questions, errors, finished pics of your own efforts welcome & much appreciated! 🙂
*Tip: If you can avoid working with embroidery floss, do. It is designed to separate, so you can imagine how easily it splits. But it’s not too awfully bad if you’re patient with it, plus, it’s cheap, & it comes in a bajillion beautiful colors.
Ideally I would have liked to use a slightly bigger hook than a 7, but my D was too big, & that is when I learned I don’t have any hooks in a size between those two. I just bought some new jumbo hooks, so I guess I now know what I need to shop for next. Ironically, I bought the jumbo hooks at the same time I bought my last packet of craft thread.
And now for then. (See what I did there?) I love horror movies, & have a special place in my heart for cheesy horror flicks. My friend Jeremy shares that passion.
One weekend we decided to have a Christmas themed horror movie fest. Unfortunately, the local video stores did not stock the Silent Night, Bloody Night movies, or anything else I was looking for, so we ended up with The Gingerdead Man & Reefer Madness: The Musical. RM:TM was fantastic! The Gingerdead Man not so much. In fact, it was the worst movie either of us had ever seen. Not quite in the “so bad it’s good way” either, but it was bad enough we became obsessed with how awful it was.
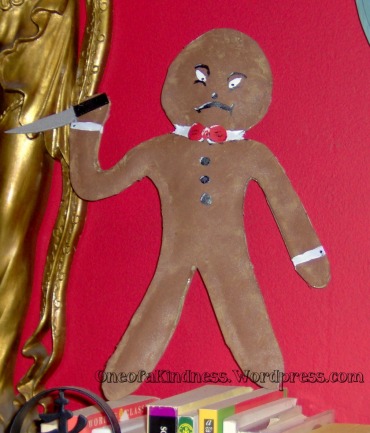
I was inspired, so for Christmas that year I made him his very own Gingerdead Man.
This was about five years ago, so I only have the completed pics, but here is what I did.
Using brown craft foam, I cut out two matching gingerbread man shapes. He didn’t look entirely like a gingerbread man in the movie, but I’m kitchen crafting, not working Hollywood magic here. It was close enough. I used a slightly darker shade of brown to sponge over him.
I hot glued the edges together starting with the legs. I worked bit by bit, letting each section dry & then stuffing it as I went. I used a chopstick to make sure the stuffing got into all the little spots. I used some regular polyfil stuffing I had & just stuffed it loosely. It wasn’t intended to be fluffy, just giving it some shape.
After it was all stuffed & glued shut, I used acrylic craft paints to paint the details on him. Since he was a murderous cookie man, I give him a menacing face & made a tiny little knife out of foam scraps. I hot glued the knife to his raised hand.
The Gingerdead Man was well received & to this day remains one of my favorite things I have made. I have never considered myself much an artist or painter, but was very pleased with how well he turned out. I even did shadows & highlights. Guess I picked up a few things living with art majors in college.
There you have it! Hopefully you enjoyed this, & if you did, I would really appreciate it if you would go & vote for me at the blog hop:
Depending on when you read this, they may not have my project up yet, but just look for it & hit the ‘like’ button. Voting ends 11:59PM CST, Wed, 12/21.

